

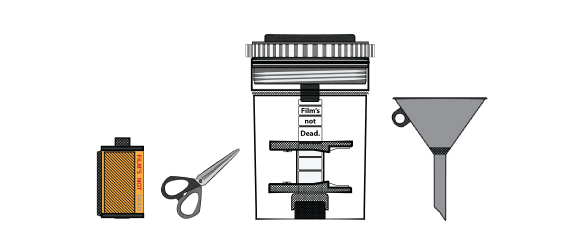
Make sure you have your Film cassette opener, scissors and developing tank in your light tight room/changing bag.
When attatching the film popper make sure you get its teeth securley under the lid, and then ease it off as if you were opening a bottle.

Once you’ve wrangled the top off the film off unravel the feeder from the film. You may recognise the feel of this from when you loaded it into your camera, hold the feeder inbetween your index and middle fingers, cut along the feeder next to your fingers, you can either cut it straight or angled.
Be careful not to cut your fingers off!
You now need to find the spool from the developing tank. Position the spool so both of the plastic tabs are next to each other. This process is fairly crucial, we recommend practising with some old negatives in the light first if possible. Now with the tabs inline you need to feed the film underneath both tabs until the film has reached the tiny ball bearing or its about halfway around the spool. Once you have fed the film into the spool, you then need to crank the spool which should drive the film around the spool. Make sure you do this smoothly. Once you have reached the end of your film re-position your index and middle fingers with the film inbetween them and cut off the film spool.


Now you have your film on the tank spool, you can put all the pieces back together. Make sure to screw the lid on tight, and to get the film rod the right way up. Once the lid is on you can leave your dark room.
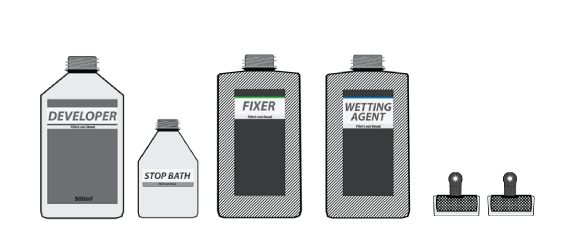
Now, time to get the developer in there! You’ll have to do some research of your own to find out your developing times and dilution, these vary with different Film & Dev combos so be sure to check that you’ve got the right one. Also make sure you mix or prepare all chemicals in a safe place, with utensils that are only for the purposes of developing or printing film.


This bits called Agitation. It requires you to turn the tank 360 and basically means your helping the developer get under the skin of your film. Agitate your film for constantly for the first minute, and then for the first 10 seconds of every consecutive minute.
Every developer is different, some you can use multiple times after making a stock solution. Some you will need to mix per film. Please check the back of your developer bottle for instructions. In this example, our developer is a pre mixed stock solution, so, we can pour it back in the bottle ready for another roll.
Once you have emptied the tank of developer give it a little rinse under a tap, remembering to check the tempreture first, 20 degrees celcius / 68 degrees farenheit is what your should be aiming for. Once rinsed with water pour in the stop bath.
Agitate the stop bath…

Usually you will need to agitate and keep the stop bath in for around 3 minutes, but as always check on the back of your own bottle! Once finished you can pour it back into its bottle. You can re-use the stop bath. Some brands will change colour when they need to be changed, some wont, but, as always, read the back of the bottle!
Time for the fixative! Most Fix you will need to mix into a stock solution, this is usually one part fix to 3 parts water, make sure to check the back of the bottle though!

Rotate the fix the same way you did for the dev, continuosly for the first minute and then for the first 10 seconds of every consecutive minute. Usually the fixer needs to be in there for about 5-6 mins.
You can pour your fix back into the bottle when finished. It will become obvious when the fixer has had enough as the film will occasionally get yellow streaks and you will begin to notice that is isnt fixing as well.


You now need to pull the film off the spool there is no need to crank it like before just put your thumb and index finger on the end and peel the film away from the spool gently.


Now you have your wet film in hand attatch a fairly heavy clip to each end and leave in a dust and people free room. Once you have it hanging up give it one clean swoop with the squeegee from top to bottom. Next step is to thoroughly clean all of your equipment with warm water and clear your work area, then pat yourself on the back! Hopefully you have stopped reading this now and are at awe with your newly self developed negatives!
