


[spb_row wrap_type=”content-width” parallax_image_height=”content-height” parallax_image_movement=”fixed” parallax_image_speed=”0.5″ bg_video_loop=”yes” parallax_video_height=”window-height” parallax_video_overlay=”none” row_overlay_opacity=”0″ vertical_center=”true” width=”1/1″ el_position=”first last”] [spb_text_block animation=”none” animation_delay=”0″ padding_vertical=”0″ padding_horizontal=”0″ width=”1/1″ el_position=”first last”]
About two years ago I was gifted 2 Polaroid Mini Portrait cameras along with some film and several film backs. People told me if I had a Polaroid 600SE those might come handy, however I didn’t so the back just collected dust while I figured out what to do with them.
Sitting in my tiny studio, Siste Skanse, surrounded with cameras of all sort I began to wonder if it was possible to attach a polaroid back to a box camera. I started going through my collection of some 20 box cameras to find one with a removable back and landed on a Kodak Brownie SIX-20 Model D Camera. I later switched to a Kodak 1916 camera, I will explain why later in the tutorial. As I removed the back I soon realised that the opening was just as big as the film opening for the Mini Portrait film backs, so I thought “What’s the worst that can happen? I burn through a pack of FP100c only to discover that it can’t be done?” I had to try.
In this tutorial I will explain how to properly attach a box camera to a polaroid back and how to experiment further with the Polakodaroid as I’ve nicknamed it. This tutorial will work with all kinds of box cameras and possible all kinds of polaroid backs I guess, however I’m concentrating on the two camera types I built something from.
First of all you need a set of tools. I like to use whatever surrounds me so a beat up taped hammer, a sharp knife and a very tiny phillips screwdriver + some electricians tape is what you need.
[/spb_text_block] [spb_text_block animation=”none” animation_delay=”0″ padding_vertical=”0″ padding_horizontal=”0″ width=”1/1″ el_position=”first last”]
Step 1: Tools

[/spb_text_block] [/spb_row] [spb_row wrap_type=”content-width” parallax_image_height=”content-height” parallax_image_movement=”fixed” parallax_image_speed=”0.5″ bg_video_loop=”yes” parallax_video_height=”window-height” parallax_video_overlay=”none” row_overlay_opacity=”0″ vertical_center=”true” width=”1/1″ el_position=”first last”] [spb_text_block animation=”none” animation_delay=”0″ padding_vertical=”0″ padding_horizontal=”0″ width=”1/1″ el_position=”first last”]
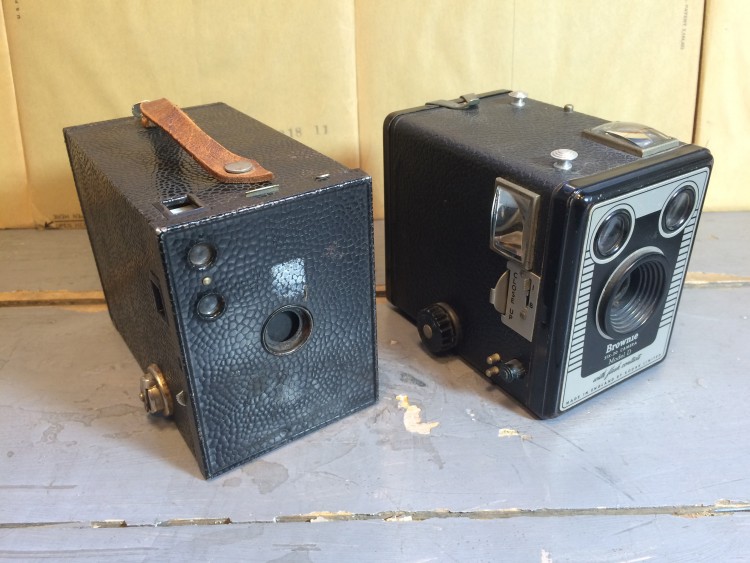
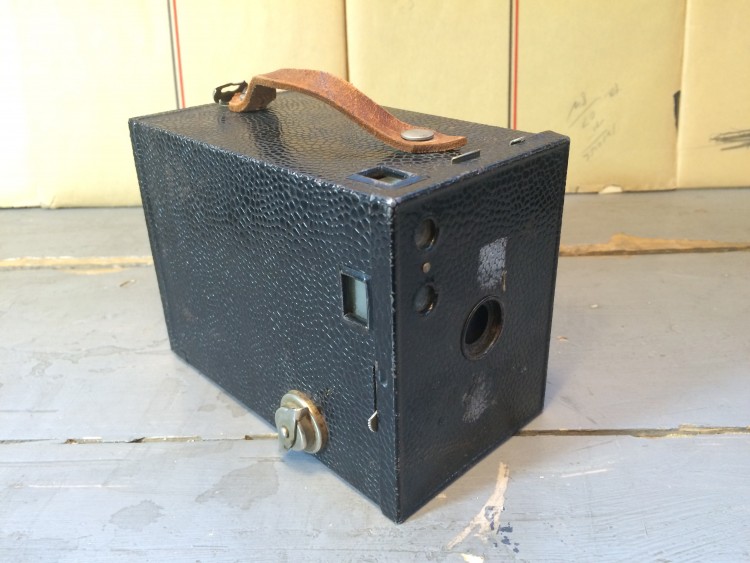
Step 2: The Camera
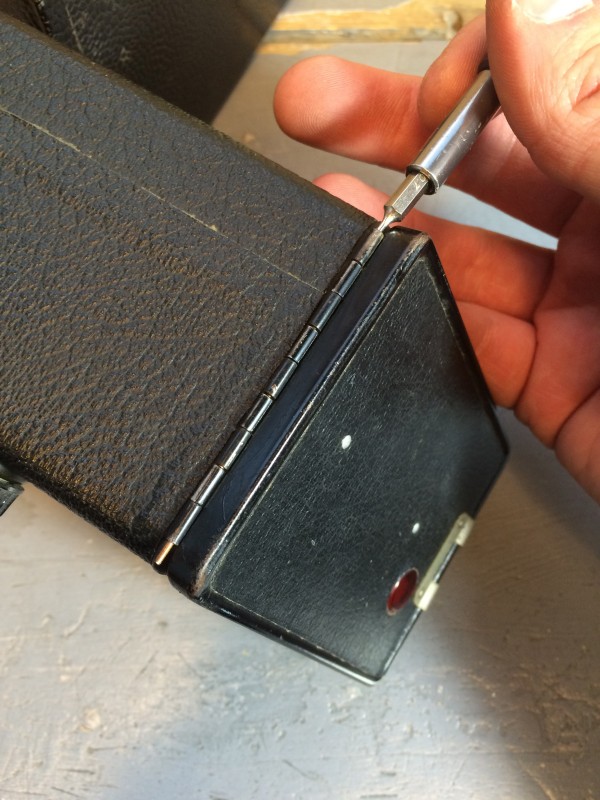
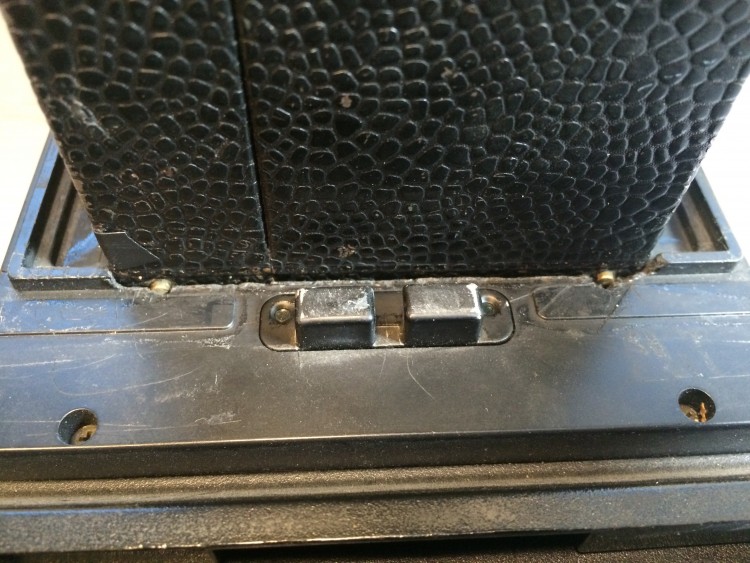
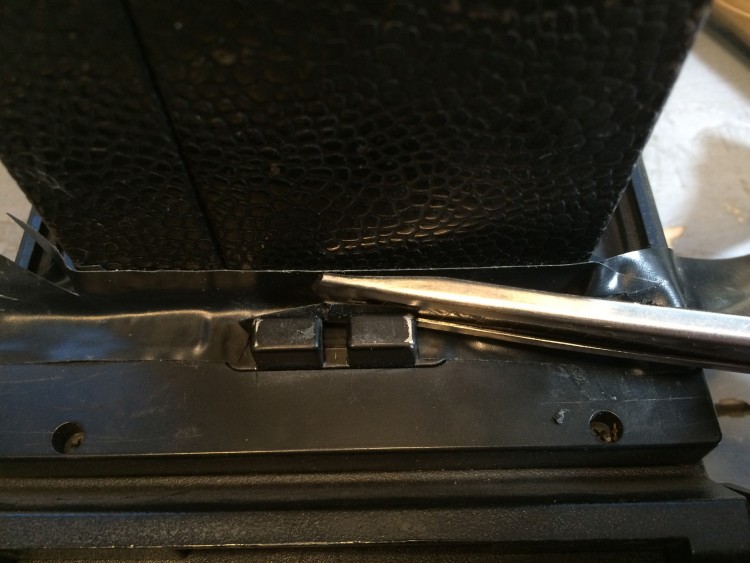
This is what the Brownie SIX-20 looks like. Locate the hinged door on the back and use the phillips screwdriver (or whatever thin thing you can find) and carefully push the long pin so you can grab it with your fingers or peelers so you’ll get the door loose. The door is not needed any more so put it away.
[/spb_text_block] [/spb_row] [spb_column width=”1/4″ el_position=”first”] [spb_text_block animation=”none” animation_delay=”0″ padding_vertical=”0″ padding_horizontal=”0″ width=”1/1″ el_position=”first last”]

[/spb_text_block] [/spb_column] [spb_column width=”1/4″] [spb_text_block animation=”none” animation_delay=”0″ padding_vertical=”0″ padding_horizontal=”0″ width=”1/1″ el_position=”first last”]
[/spb_text_block] [/spb_column] [spb_column width=”1/4″] [spb_text_block animation=”none” animation_delay=”0″ padding_vertical=”0″ padding_horizontal=”0″ width=”1/1″ el_position=”first last”]
[/spb_text_block] [/spb_column] [spb_column width=”1/4″ el_position=”last”] [spb_text_block animation=”none” animation_delay=”0″ padding_vertical=”0″ padding_horizontal=”0″ width=”1/1″ el_position=”first last”]
[/spb_text_block] [/spb_column] [spb_row wrap_type=”content-width” parallax_image_height=”content-height” parallax_image_movement=”fixed” parallax_image_speed=”0.5″ bg_video_loop=”yes” parallax_video_height=”window-height” parallax_video_overlay=”none” row_overlay_opacity=”0″ vertical_center=”true” width=”1/1″ el_position=”first last”] [spb_text_block animation=”none” animation_delay=”0″ padding_vertical=”0″ padding_horizontal=”0″ width=”1/1″ el_position=”first last”]
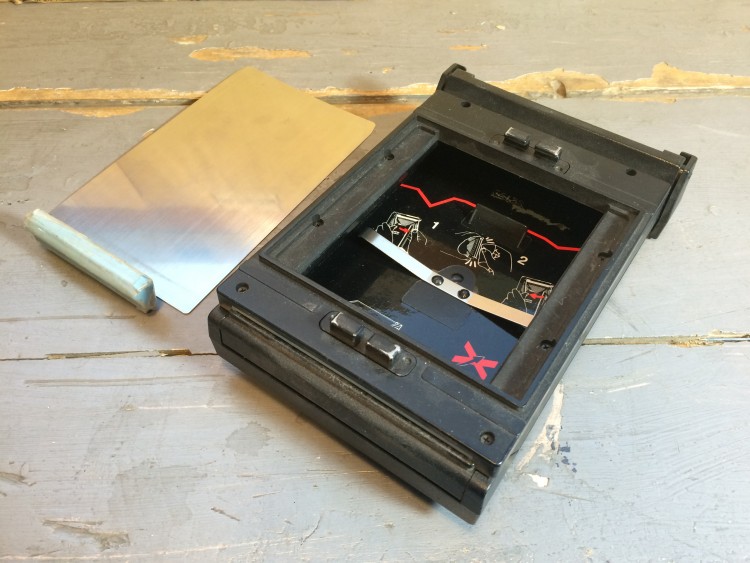
Step 3: The polaroid back
[/spb_text_block] [/spb_row] [spb_column width=”1/2″ el_position=”first”] [spb_text_block animation=”none” animation_delay=”0″ padding_vertical=”0″ padding_horizontal=”0″ width=”1/1″ el_position=”first last”]
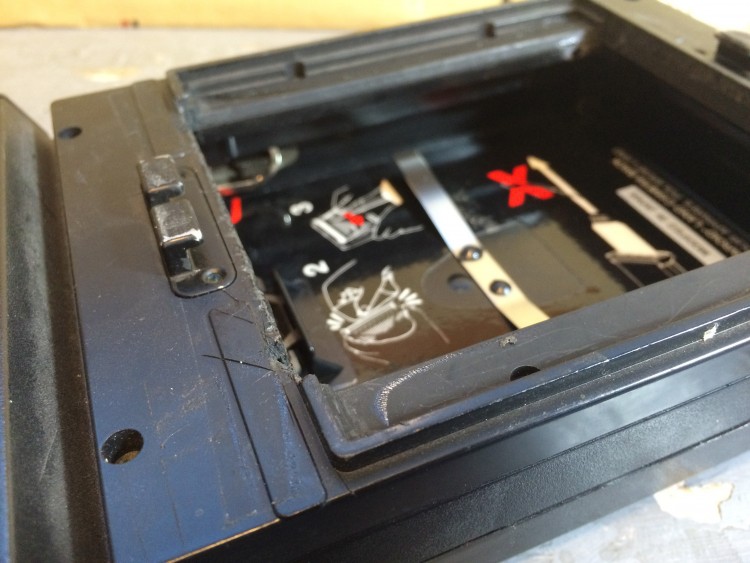
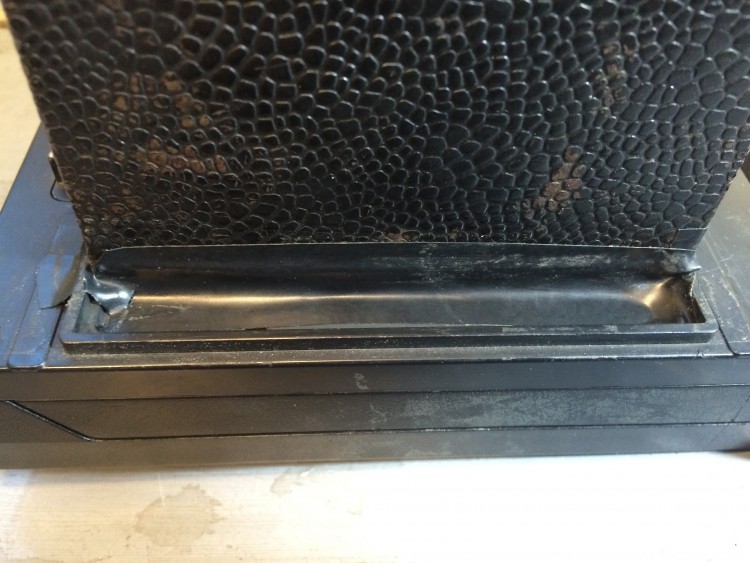
Try to place the camera back inside the polaroid holder. As you’ll probably notice it doesn’t fit properly so you’ll have to trim some plastic off the back to get the perfect fit. Doesnt matter what side you choose. Carefully remove one side of the plastic so the back will snuggly fit into the opening of the polaroid back, as shown in the last photo below.
[/spb_text_block] [/spb_column] [spb_column width=”1/4″] [spb_text_block animation=”none” animation_delay=”0″ padding_vertical=”0″ padding_horizontal=”0″ width=”1/1″ el_position=”first last”]
[/spb_text_block] [/spb_column] [spb_column width=”1/4″ el_position=”last”] [spb_text_block animation=”none” animation_delay=”0″ padding_vertical=”0″ padding_horizontal=”0″ width=”1/1″ el_position=”first last”]
[/spb_text_block] [/spb_column] [spb_column width=”1/3″ el_position=”first”] [spb_text_block animation=”none” animation_delay=”0″ padding_vertical=”0″ padding_horizontal=”0″ width=”1/1″ el_position=”first last”]
[/spb_text_block] [/spb_column] [spb_column width=”1/3″] [spb_text_block animation=”none” animation_delay=”0″ padding_vertical=”0″ padding_horizontal=”0″ width=”1/1″ el_position=”first last”]

[/spb_text_block] [/spb_column] [spb_column width=”1/3″ el_position=”last”] [spb_text_block animation=”none” animation_delay=”0″ padding_vertical=”0″ padding_horizontal=”0″ width=”1/1″ el_position=”first last”]
[/spb_text_block] [/spb_column] [spb_row wrap_type=”content-width” parallax_image_height=”content-height” parallax_image_movement=”fixed” parallax_image_speed=”0.5″ bg_video_loop=”yes” parallax_video_height=”window-height” parallax_video_overlay=”none” row_overlay_opacity=”0″ vertical_center=”true” width=”1/1″ el_position=”first last”] [spb_text_block animation=”none” animation_delay=”0″ padding_vertical=”0″ padding_horizontal=”0″ width=”1/1″ el_position=”first last”]
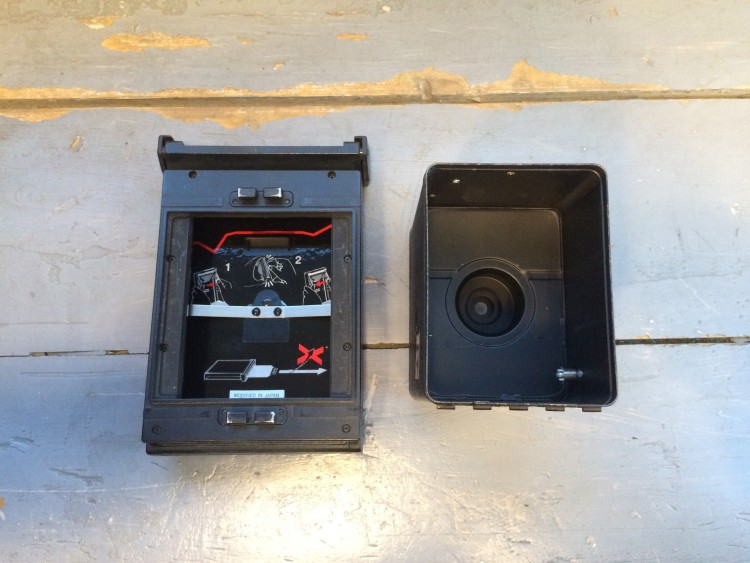
Step 3.5: The Polaroid Back Continued
[/spb_text_block] [/spb_row] [spb_column width=”1/3″ el_position=”first”] [spb_text_block animation=”none” animation_delay=”0″ padding_vertical=”0″ padding_horizontal=”0″ width=”1/1″ el_position=”first last”]
[/spb_text_block] [/spb_column] [spb_column width=”1/3″] [spb_text_block animation=”none” animation_delay=”0″ padding_vertical=”0″ padding_horizontal=”0″ width=”1/1″ el_position=”first last”]
[/spb_text_block] [/spb_column] [spb_column width=”1/3″ el_position=”last”] [spb_text_block animation=”none” animation_delay=”0″ padding_vertical=”0″ padding_horizontal=”0″ width=”1/1″ el_position=”first last”]
[/spb_text_block] [/spb_column] [spb_row wrap_type=”content-width” parallax_image_height=”content-height” parallax_image_movement=”fixed” parallax_image_speed=”0.5″ bg_video_loop=”yes” parallax_video_height=”window-height” parallax_video_overlay=”none” row_overlay_opacity=”0″ vertical_center=”true” width=”1/1″ el_position=”first last”] [spb_text_block animation=”none” animation_delay=”0″ padding_vertical=”0″ padding_horizontal=”0″ width=”1/1″ el_position=”first last”]
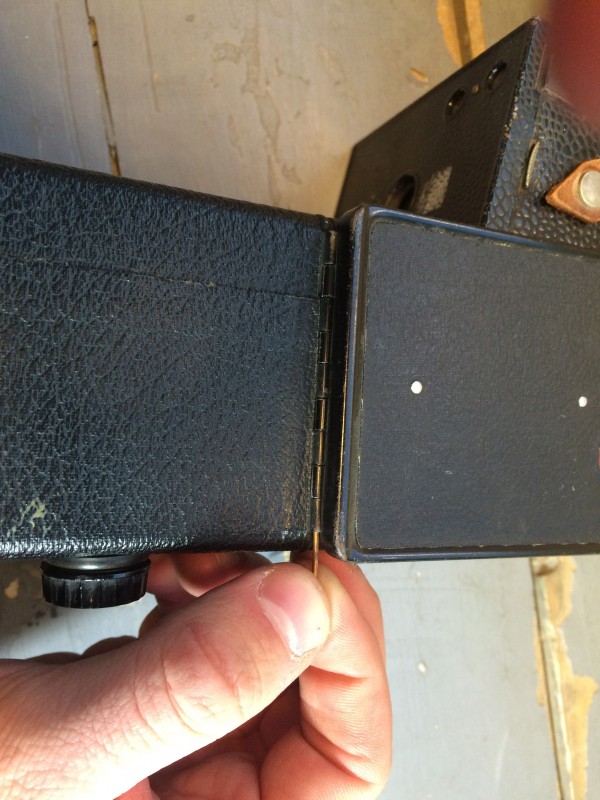
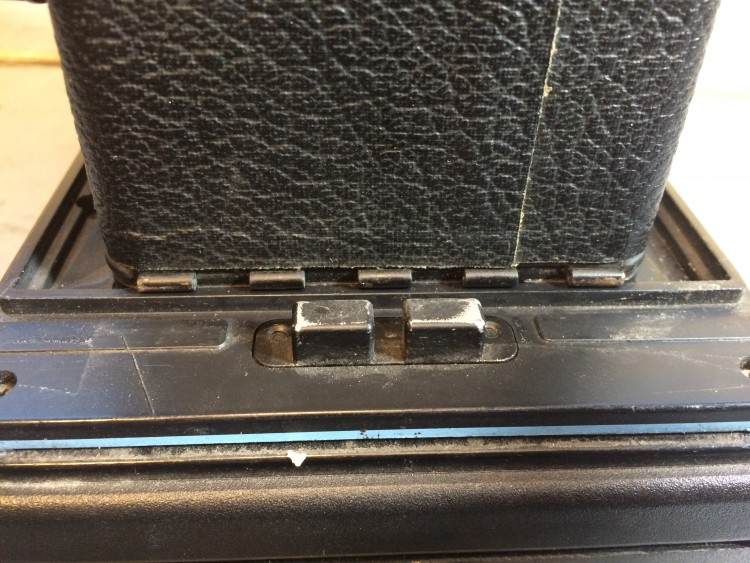
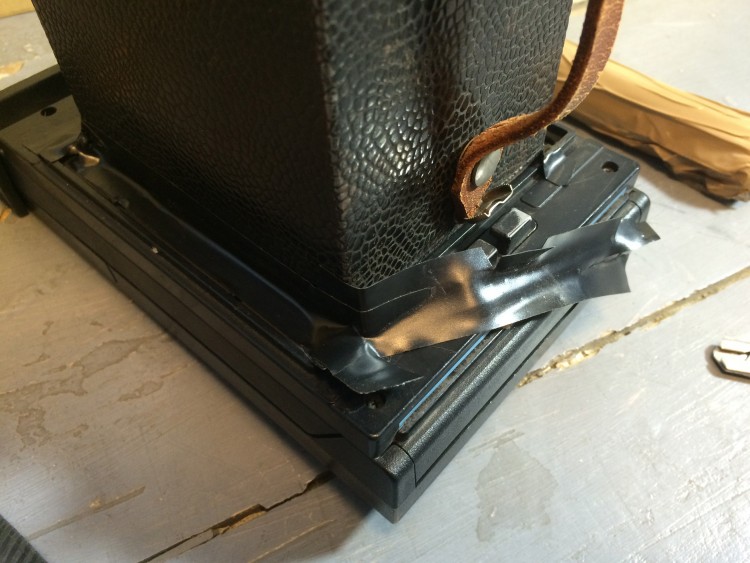
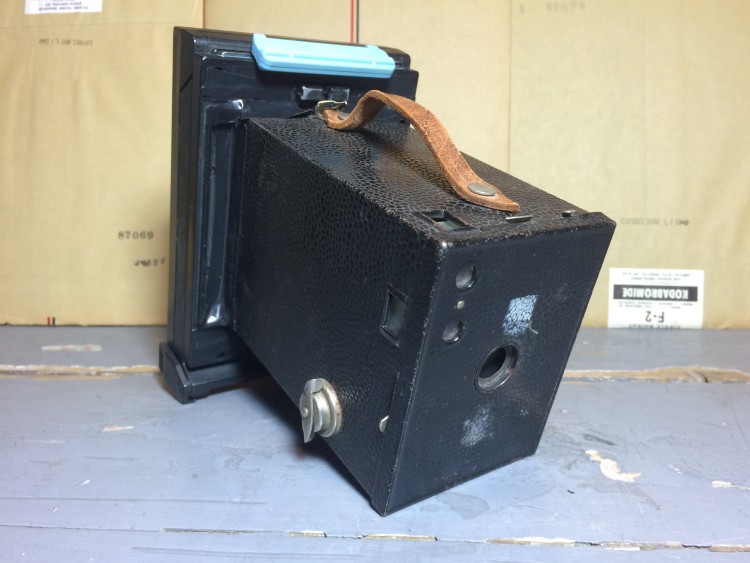
As the previous images has shown the camera fits into the opening, however the hinges attached to the camera doesn’t allow it to be fully level. To remove this problem you can either trim the other edge as well or just leave it like it is. Use the electricians tape to seal the light gaps and you’re all set. If you, like me, want to switch cameras I’d recommend to find a much older model that has a removable back, but doesn’t have any hinges. I present to you the Kodak 1916 Brownie Camera.
[/spb_text_block] [/spb_row] [spb_row wrap_type=”content-width” parallax_image_height=”content-height” parallax_image_movement=”fixed” parallax_image_speed=”0.5″ bg_video_loop=”yes” parallax_video_height=”window-height” parallax_video_overlay=”none” row_overlay_opacity=”0″ vertical_center=”true” width=”1/1″ el_position=”first last”] [spb_text_block animation=”none” animation_delay=”0″ padding_vertical=”0″ padding_horizontal=”0″ width=”1/1″ el_position=”first last”]
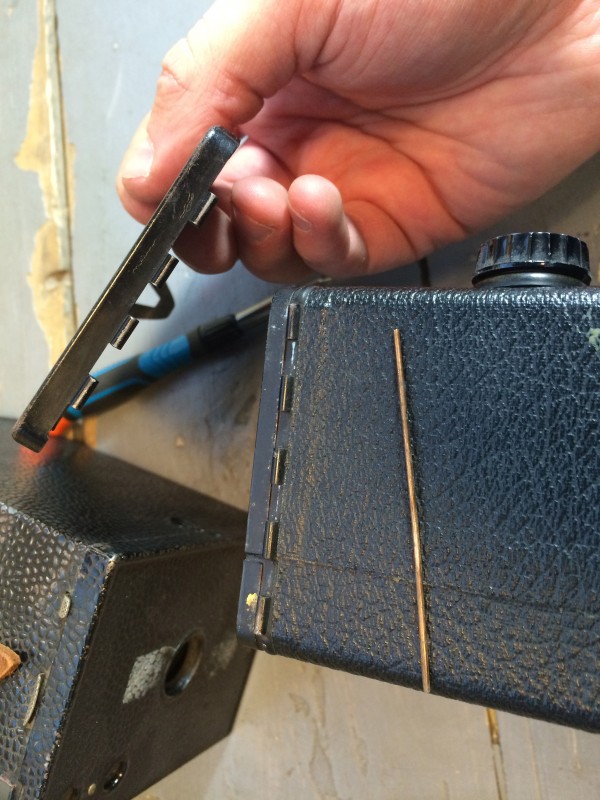
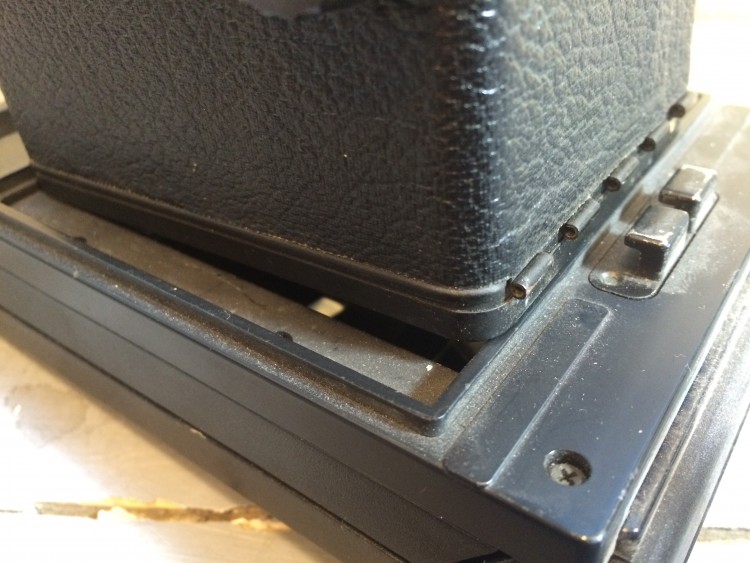
Step 4: Switch camera
As you can see in the photo the 1916 camera has less hinges and they can therefore be cut out from the already removed edge, I’ll show how in the next photos.

[/spb_text_block] [/spb_row] [spb_column width=”2/3″ el_position=”first”] [spb_text_block animation=”none” animation_delay=”0″ padding_vertical=”0″ padding_horizontal=”0″ width=”1/1″ el_position=”first last”]
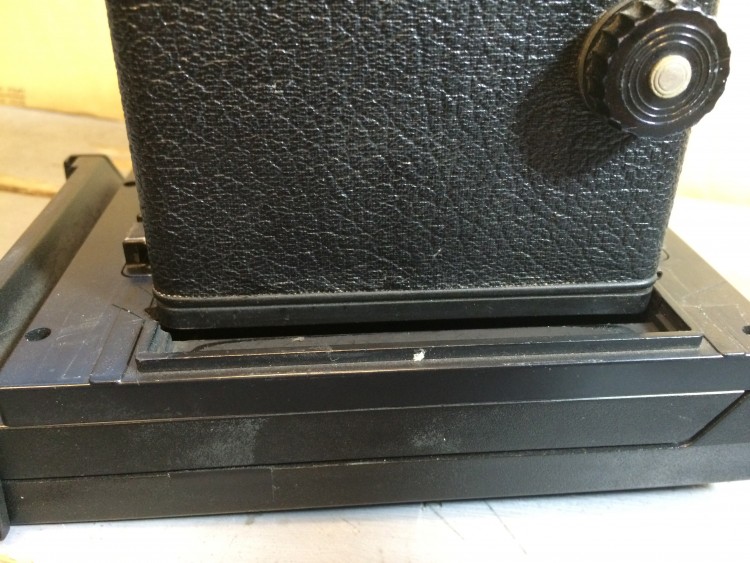
By replacing the camera I saved myself a lot of time to carefully cut out where the hinges for the other camera would go and a 1916 camera on top of a polaroid back looks way cooler than a camera from 1956!
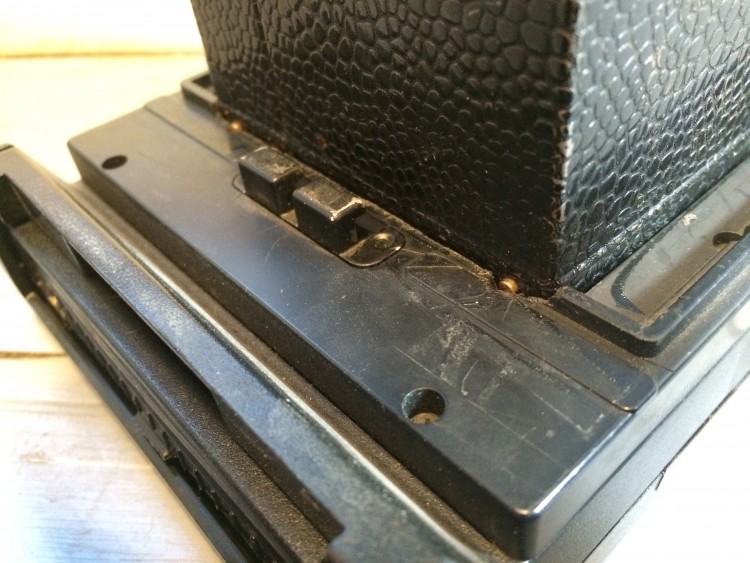
By now you’ve probably noticed that the box camera is level with the polaroid back and fits snuggly, however you still have some gaps that needs to be covered. You can use whatever tape or sealing you want, I’ve used electricans tape because it’s easy to modify and remove and sticks well again + it gives you some interesting light leaks if you’re into that. It might be hard to stick the tape to certain areas, I use the tip of my knife to reach them. Now you’re all set with a brand new freak camera and let’s head straight into how to photograph with it!
[/spb_text_block] [/spb_column] [spb_column width=”1/3″ el_position=”last”] [spb_text_block animation=”none” animation_delay=”0″ padding_vertical=”0″ padding_horizontal=”0″ width=”1/1″ el_position=”first last”]
[/spb_text_block] [/spb_column] [spb_column width=”1/3″ el_position=”first”] [spb_text_block animation=”none” animation_delay=”0″ padding_vertical=”0″ padding_horizontal=”0″ width=”1/1″ el_position=”first last”]
[/spb_text_block] [/spb_column] [spb_column width=”1/3″] [spb_text_block animation=”none” animation_delay=”0″ padding_vertical=”0″ padding_horizontal=”0″ width=”1/1″ el_position=”first last”]

[/spb_text_block] [/spb_column] [spb_column width=”1/3″ el_position=”last”] [spb_text_block animation=”none” animation_delay=”0″ padding_vertical=”0″ padding_horizontal=”0″ width=”1/1″ el_position=”first last”]
[/spb_text_block] [/spb_column] [spb_column width=”1/3″ el_position=”first”] [spb_text_block animation=”none” animation_delay=”0″ padding_vertical=”0″ padding_horizontal=”0″ width=”1/1″ el_position=”first last”]
[/spb_text_block] [/spb_column] [spb_column width=”1/3″] [spb_text_block animation=”none” animation_delay=”0″ padding_vertical=”0″ padding_horizontal=”0″ width=”1/1″ el_position=”first last”]
[/spb_text_block] [/spb_column] [spb_column width=”1/3″ el_position=”last”] [spb_text_block animation=”none” animation_delay=”0″ padding_vertical=”0″ padding_horizontal=”0″ width=”1/1″ el_position=”first last”]
[/spb_text_block] [/spb_column] [spb_row wrap_type=”content-width” parallax_image_height=”content-height” parallax_image_movement=”fixed” parallax_image_speed=”0.5″ bg_video_loop=”yes” parallax_video_height=”window-height” parallax_video_overlay=”none” row_overlay_opacity=”0″ vertical_center=”true” width=”1/1″ el_position=”first last”] [spb_text_block animation=”none” animation_delay=”0″ padding_vertical=”0″ padding_horizontal=”0″ width=”1/1″ el_position=”first last”]
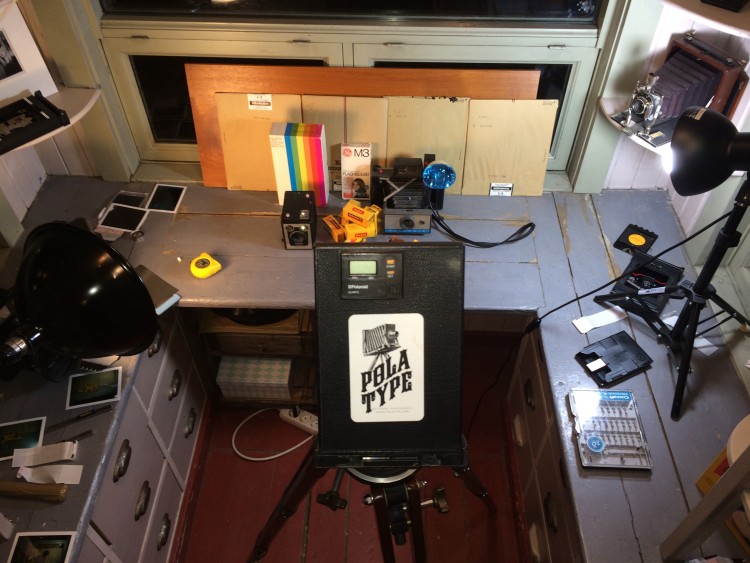
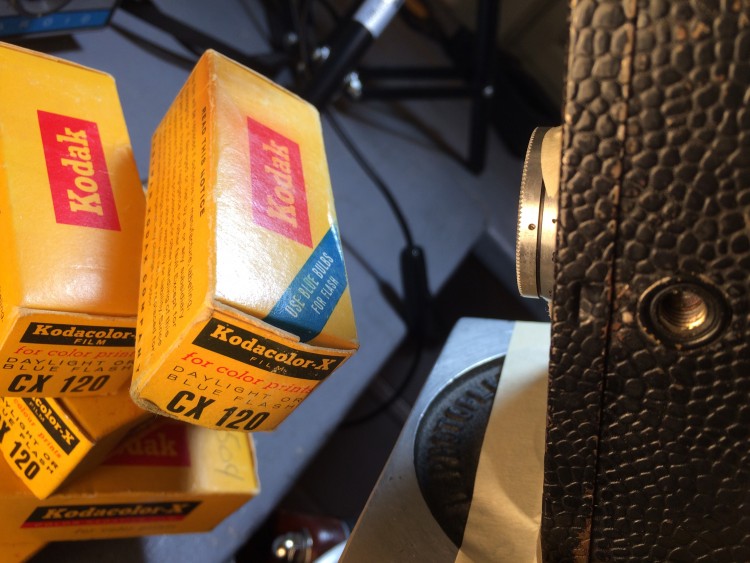
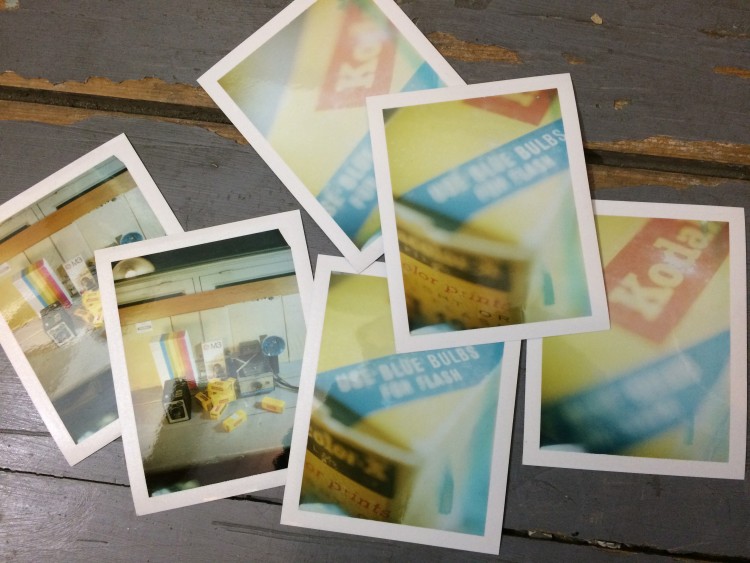
With every camera I build a lot of film gets wasted on trying to find the focus distance. If you have the same camera as I have you’re lucky since I’ve already figured it out and the focus distance is 1 meter.
The setup below (right) gives you this result: In focus! Yay!
[/spb_text_block] [/spb_row] [spb_column width=”1/2″ el_position=”first”] [spb_text_block animation=”none” animation_delay=”0″ padding_vertical=”0″ padding_horizontal=”0″ width=”1/1″ el_position=”first last”]
[/spb_text_block] [/spb_column] [spb_column width=”1/2″ el_position=”last”] [spb_text_block animation=”none” animation_delay=”0″ padding_vertical=”0″ padding_horizontal=”0″ width=”1/1″ el_position=”first last”]

[/spb_text_block] [/spb_column] [spb_row wrap_type=”content-width” parallax_image_height=”content-height” parallax_image_movement=”fixed” parallax_image_speed=”0.5″ bg_video_loop=”yes” parallax_video_height=”window-height” parallax_video_overlay=”none” row_overlay_opacity=”0″ vertical_center=”true” width=”1/1″ el_position=”first last”] [spb_blank_spacer height=”30px” width=”1/1″ el_position=”first last”] [spb_text_block animation=”none” animation_delay=”0″ padding_vertical=”0″ padding_horizontal=”0″ width=”1/1″ el_position=”first last”]
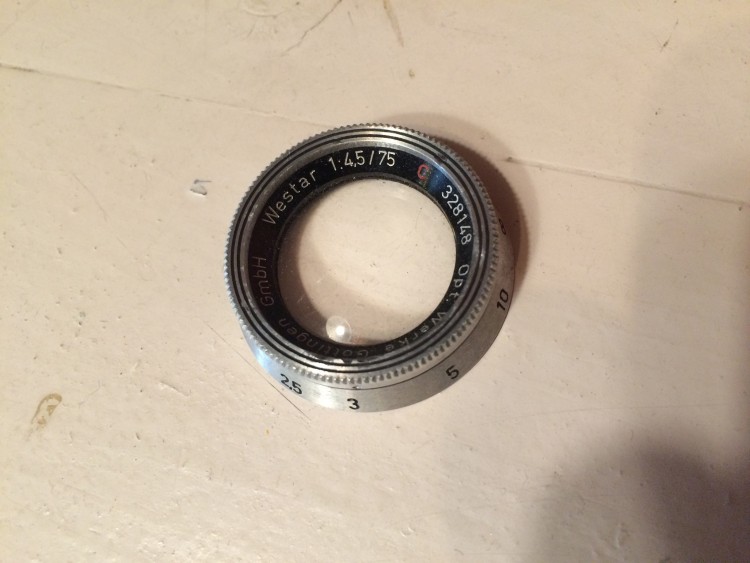
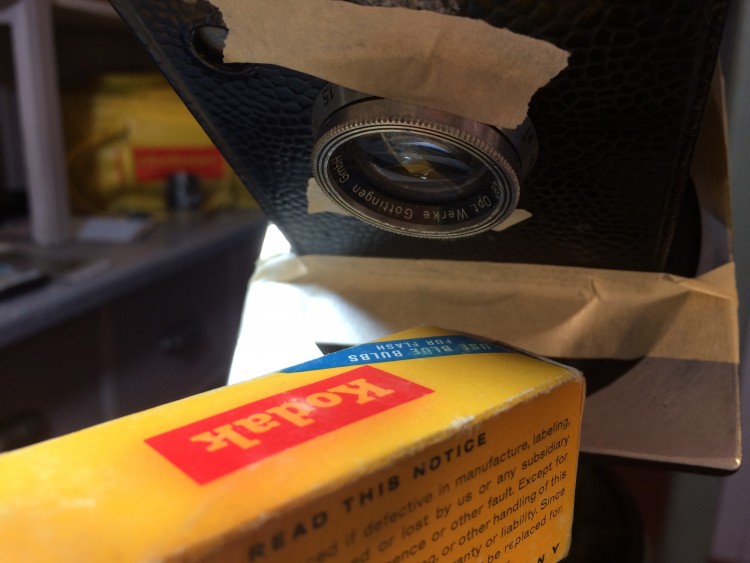
Step 5: Macro lens
After burning through some 10-20 packs of FP100c on this camera I started to experiment with the use of different lenses just to see if it was possible to create a macro Polakodaroid camera and somehow I managed to find the perfect lens attached to a Westar camera. The Westar camera is somewhere (I put it somewhere for safe keeping, however I have no idea where). The lens I use for macro images is a f4.5 / 75mm lens and it works quite good. I’ve simply attached it with painters tape to the body and the focus distance is 3.5cm. There you have it, you’ve converted a brownie into a working polaroid camera!
[/spb_text_block] [/spb_row] [spb_column width=”1/3″ el_position=”first”] [spb_text_block animation=”none” animation_delay=”0″ padding_vertical=”0″ padding_horizontal=”0″ width=”1/1″ el_position=”first last”]
[/spb_text_block] [/spb_column] [spb_column width=”1/3″] [spb_text_block animation=”none” animation_delay=”0″ padding_vertical=”0″ padding_horizontal=”0″ width=”1/1″ el_position=”first last”]
[/spb_text_block] [/spb_column] [spb_column width=”1/3″ el_position=”last”] [spb_text_block animation=”none” animation_delay=”0″ padding_vertical=”0″ padding_horizontal=”0″ width=”1/1″ el_position=”first last”]
[/spb_text_block] [/spb_column] [spb_column width=”1/3″ el_position=”first”] [spb_text_block animation=”none” animation_delay=”0″ padding_vertical=”0″ padding_horizontal=”0″ width=”1/1″ el_position=”first last”]
[/spb_text_block] [/spb_column] [spb_column width=”1/3″] [spb_text_block animation=”none” animation_delay=”0″ padding_vertical=”0″ padding_horizontal=”0″ width=”1/1″ el_position=”first last”]

[/spb_text_block] [/spb_column] [spb_column width=”1/3″ el_position=”last”] [spb_text_block animation=”none” animation_delay=”0″ padding_vertical=”0″ padding_horizontal=”0″ width=”1/1″ el_position=”first last”]

[/spb_text_block] [/spb_column] [spb_row wrap_type=”content-width” parallax_image_height=”content-height” parallax_image_movement=”fixed” parallax_image_speed=”0.5″ bg_video_loop=”yes” parallax_video_height=”window-height” parallax_video_overlay=”none” row_overlay_opacity=”0″ vertical_center=”true” width=”1/1″ el_position=”first last”] [spb_text_block animation=”none” animation_delay=”0″ padding_vertical=”0″ padding_horizontal=”0″ width=”1/1″ el_position=”first last”]
Author: Kristian O. Gundersen – Siste Skanse
The Worlds Smallest Portrait Studio
[/spb_text_block] [/spb_row]
